
Tiny Artifacts, Big Questions: More from the World of Disk Beads
Ground stone expert Jenny Adams has more to share about the analysis of disk beads.
My previous blog about distinguishing stone from fired-clay disk beads using low-power magnification techniques was just a teaser. There is much more to learn about disk beads—I didn’t even mention the identification of shell disk beads. Researchers are also using chemical and high-power magnification techniques to identify material types, conducting experiments to better understand how disk beads were manufactured, and performing use-wear analysis of beads and the tools used to make them.
The beads discussed in the previous blog were from Desert Archaeology’s excavations at the Wetlands, Honey Bee Village, and Yuma Wash sites in the Tucson area. When the shell beads we recovered are added to the stone and fired-clay beads from these sites, the total number we analyzed tops 21,000 disk beads. Arthur Vokes (Arizona State Museum) analyzed the shell ornaments from Wetlands, and Desert’s Chris Virden-Lange analyzed those from from Honey Bee and Yuma Wash (Vokes wrote the reports on those collections from her data). Sometimes during the analysis, they found stone beads mixed in with their shell bead samples and traded them for the shell disk beads that were mistakenly put in the bags of stone or fired-clay beads. Faced with thousands of these tiny (~5 mm) beads, how did we recognize the shell artifacts? The most obvious attribute for distinguishing shell beads is a feathery appearance created by laminations of calcium carbonate and calcium aragonite; each lamination was deposited during shell growth. Sometimes it takes viewing at a magnification of at least 20x, but the feathery appearance or laminations are visible even when the ornaments have been shaped through abrasion or have gone through cremation fires.
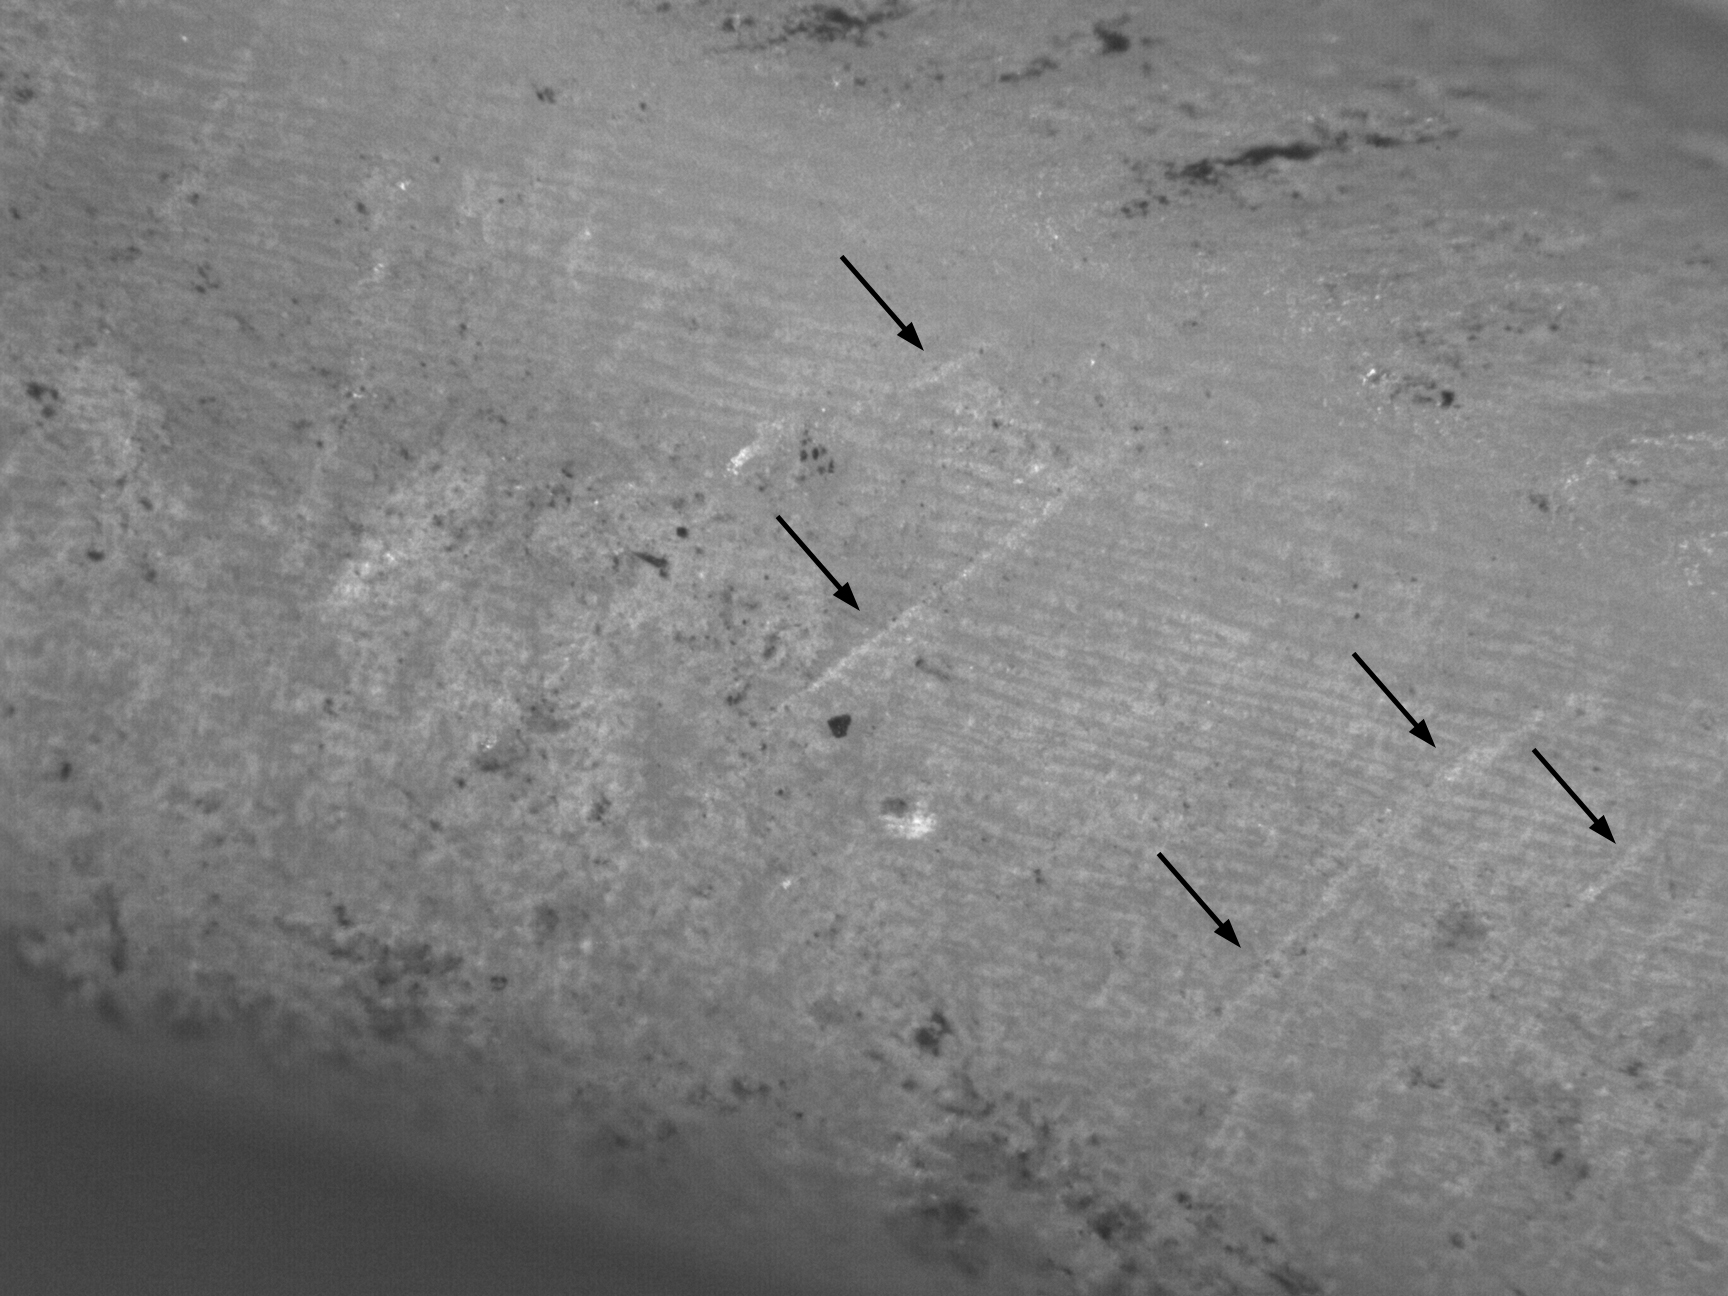
Photomicrograph at 40x magnification of a shell bracelet from the pre-Classic Hohokam site of La Villa in Phoenix (click to enlarge). The scattered diagonal abrasions (arrows) are from manufacturing. The multiple horizontal lines are the laminations that give the shell a feathery appearance. Photomicrograph by Jenny Adams.
Other identification methods go beyond low-magnification microscopy. Researchers at the Gila River Indian Community, Cultural Resource Management Program have tested analytical techniques for distinguishing materials used to make disk beads. Chris Loendorf and Craig Fertelmes have conducted elemental composition analysis of shell and stone beads using Energy Dispersive X-Ray Florescence (EDXRF). They concluded that shell was easily distinguished by high amounts of calcium and strontium lacking in most types of stone. Their studies are part of ongoing artifact composition research within the program.
Dr. Mary Ownby, Desert Archaeology petrographer, used Scanning Electron Microscopy-Energy Dispersive Spectroscopy (SEM-EDS) to identify visual and chemical differences among the raw materials used to make fired-clay and stone beads at the Early Agricultural period Wetlands site in Tucson. Many of these beads were made from siltstone or mudstone, so recognizing the proportional differences of the similar elements in clays and these metamorphosed-clay rocks is crucial. Mary and I are co-authoring a paper for journal publication that will formally present her conclusions.
Also exciting are the experiments conducted by Zack Curcija for his master’s thesis research at Northern Arizona University. He tested manufacturing techniques described by Emil Haury 80 years ago and found that flaked stone microdrills are much more efficient than the cactus needles Haury used to experimentally drill holes in the tiniest disk beads made of shell and soft stone. Zack also worked a string of disk beads across the surface of a stationary netherstone, using a technique described by Haury. He is currently working on an article that updates Haury’s time estimates for bead manufacture and another that describes his experiments with microdrills.
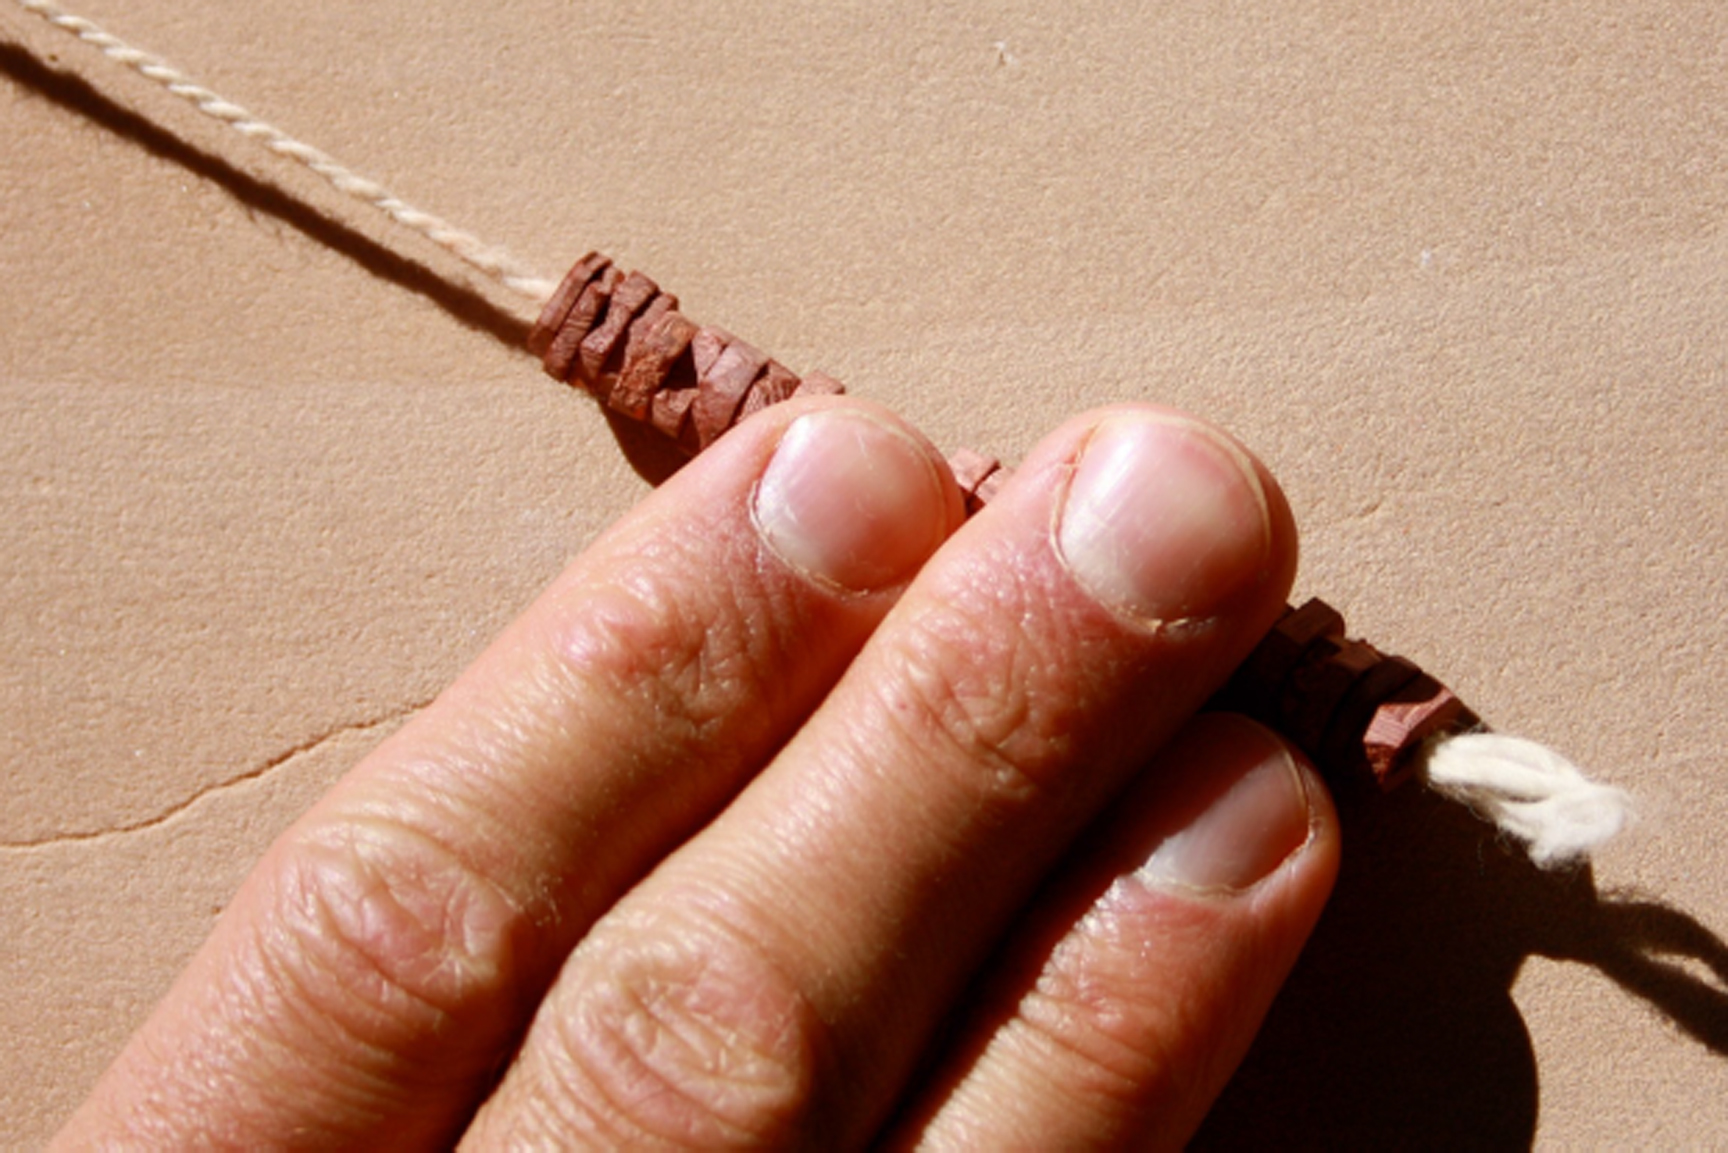
Multiple beads strung together for final shaping against a flat, fine-grained netherstone. Photograph from Zack Curcija’s master’s thesis at Northern Arizona University, used with permission.
The identification of lapstones (netherstones that are held by the user while working) suitable for shaping small ornaments was facilitated by use-wear analysis techniques. Lapstones vary in granularity, with coarser-grained rocks used in the forming stages of manufacture and finer-grained rocks used in the finishing stages. These lapstones fit in the palm; individual ornaments were worked across their surfaces.
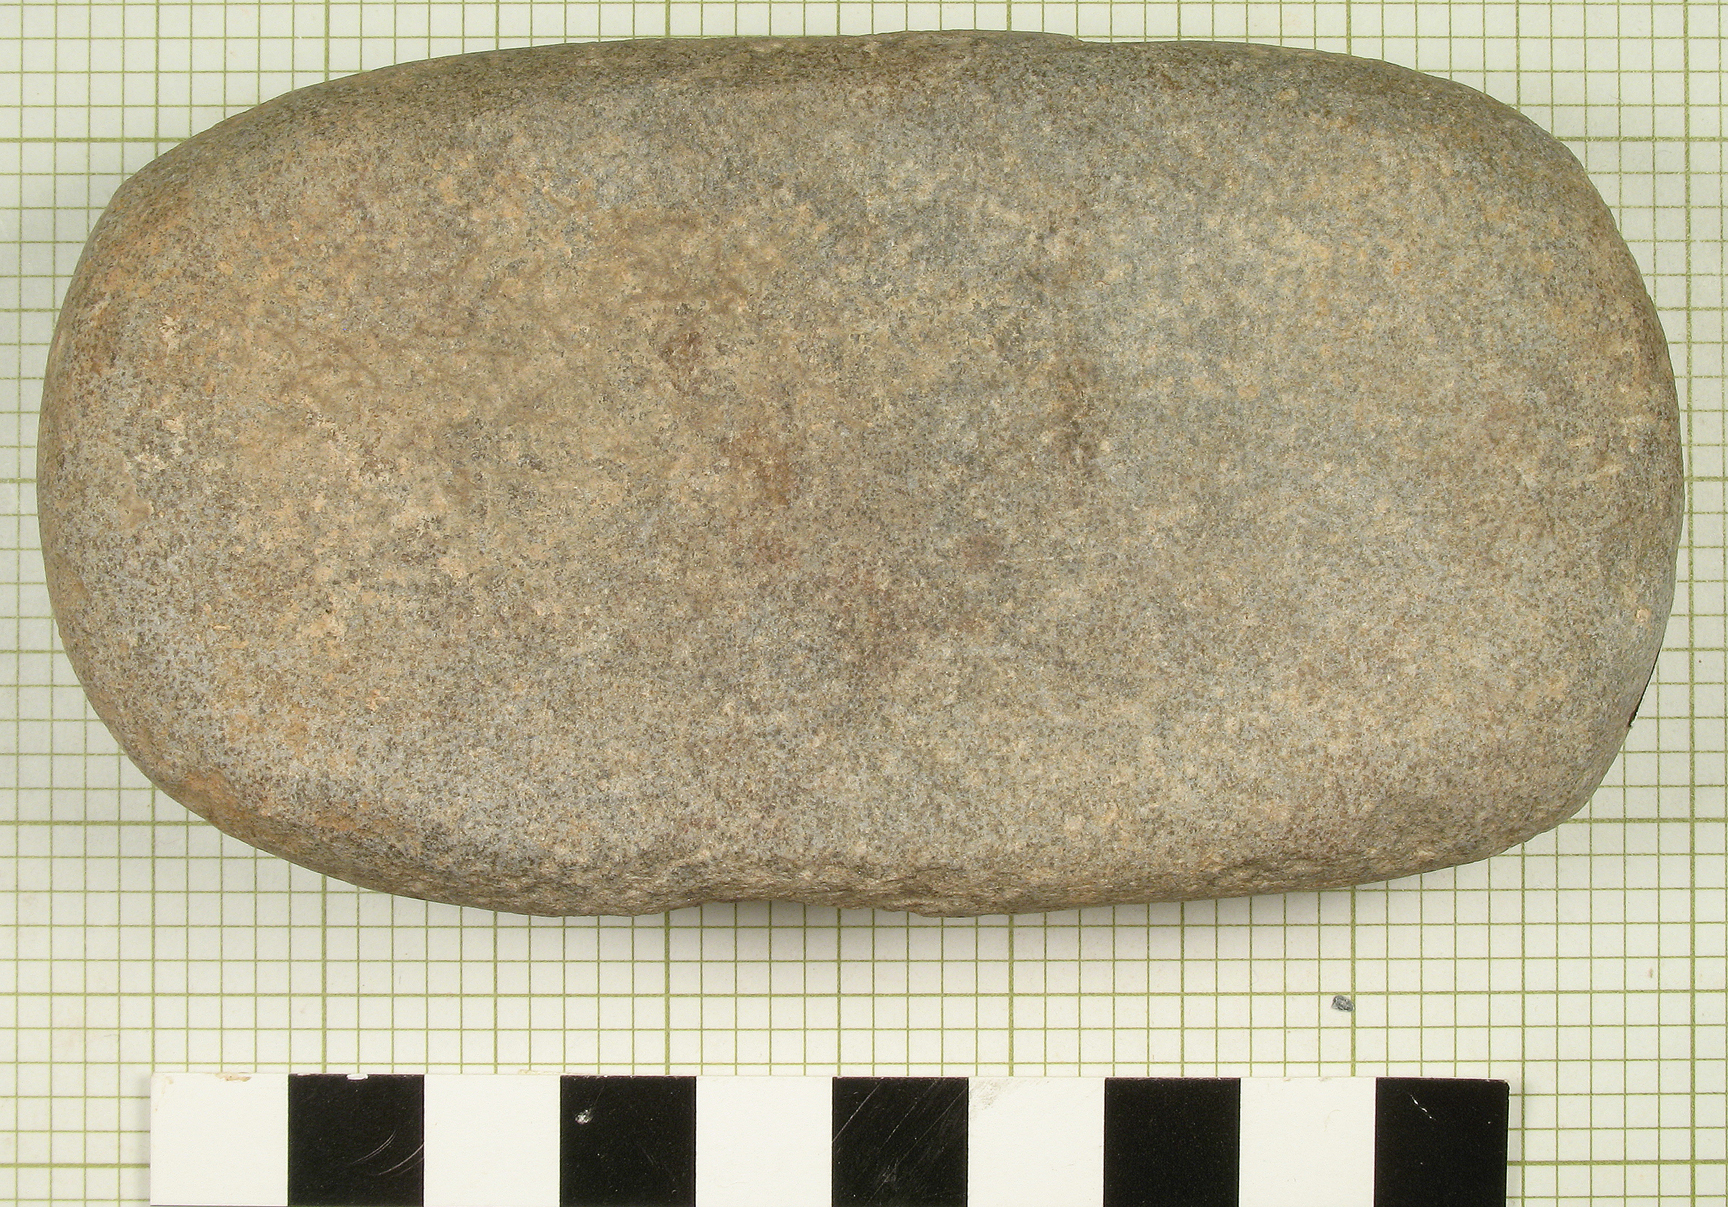
Lapstone found at La Villa that is coarse-grained enough to have been used in the forming stage of stone or shell ornament manufacture. Photo by Jenny Adams.
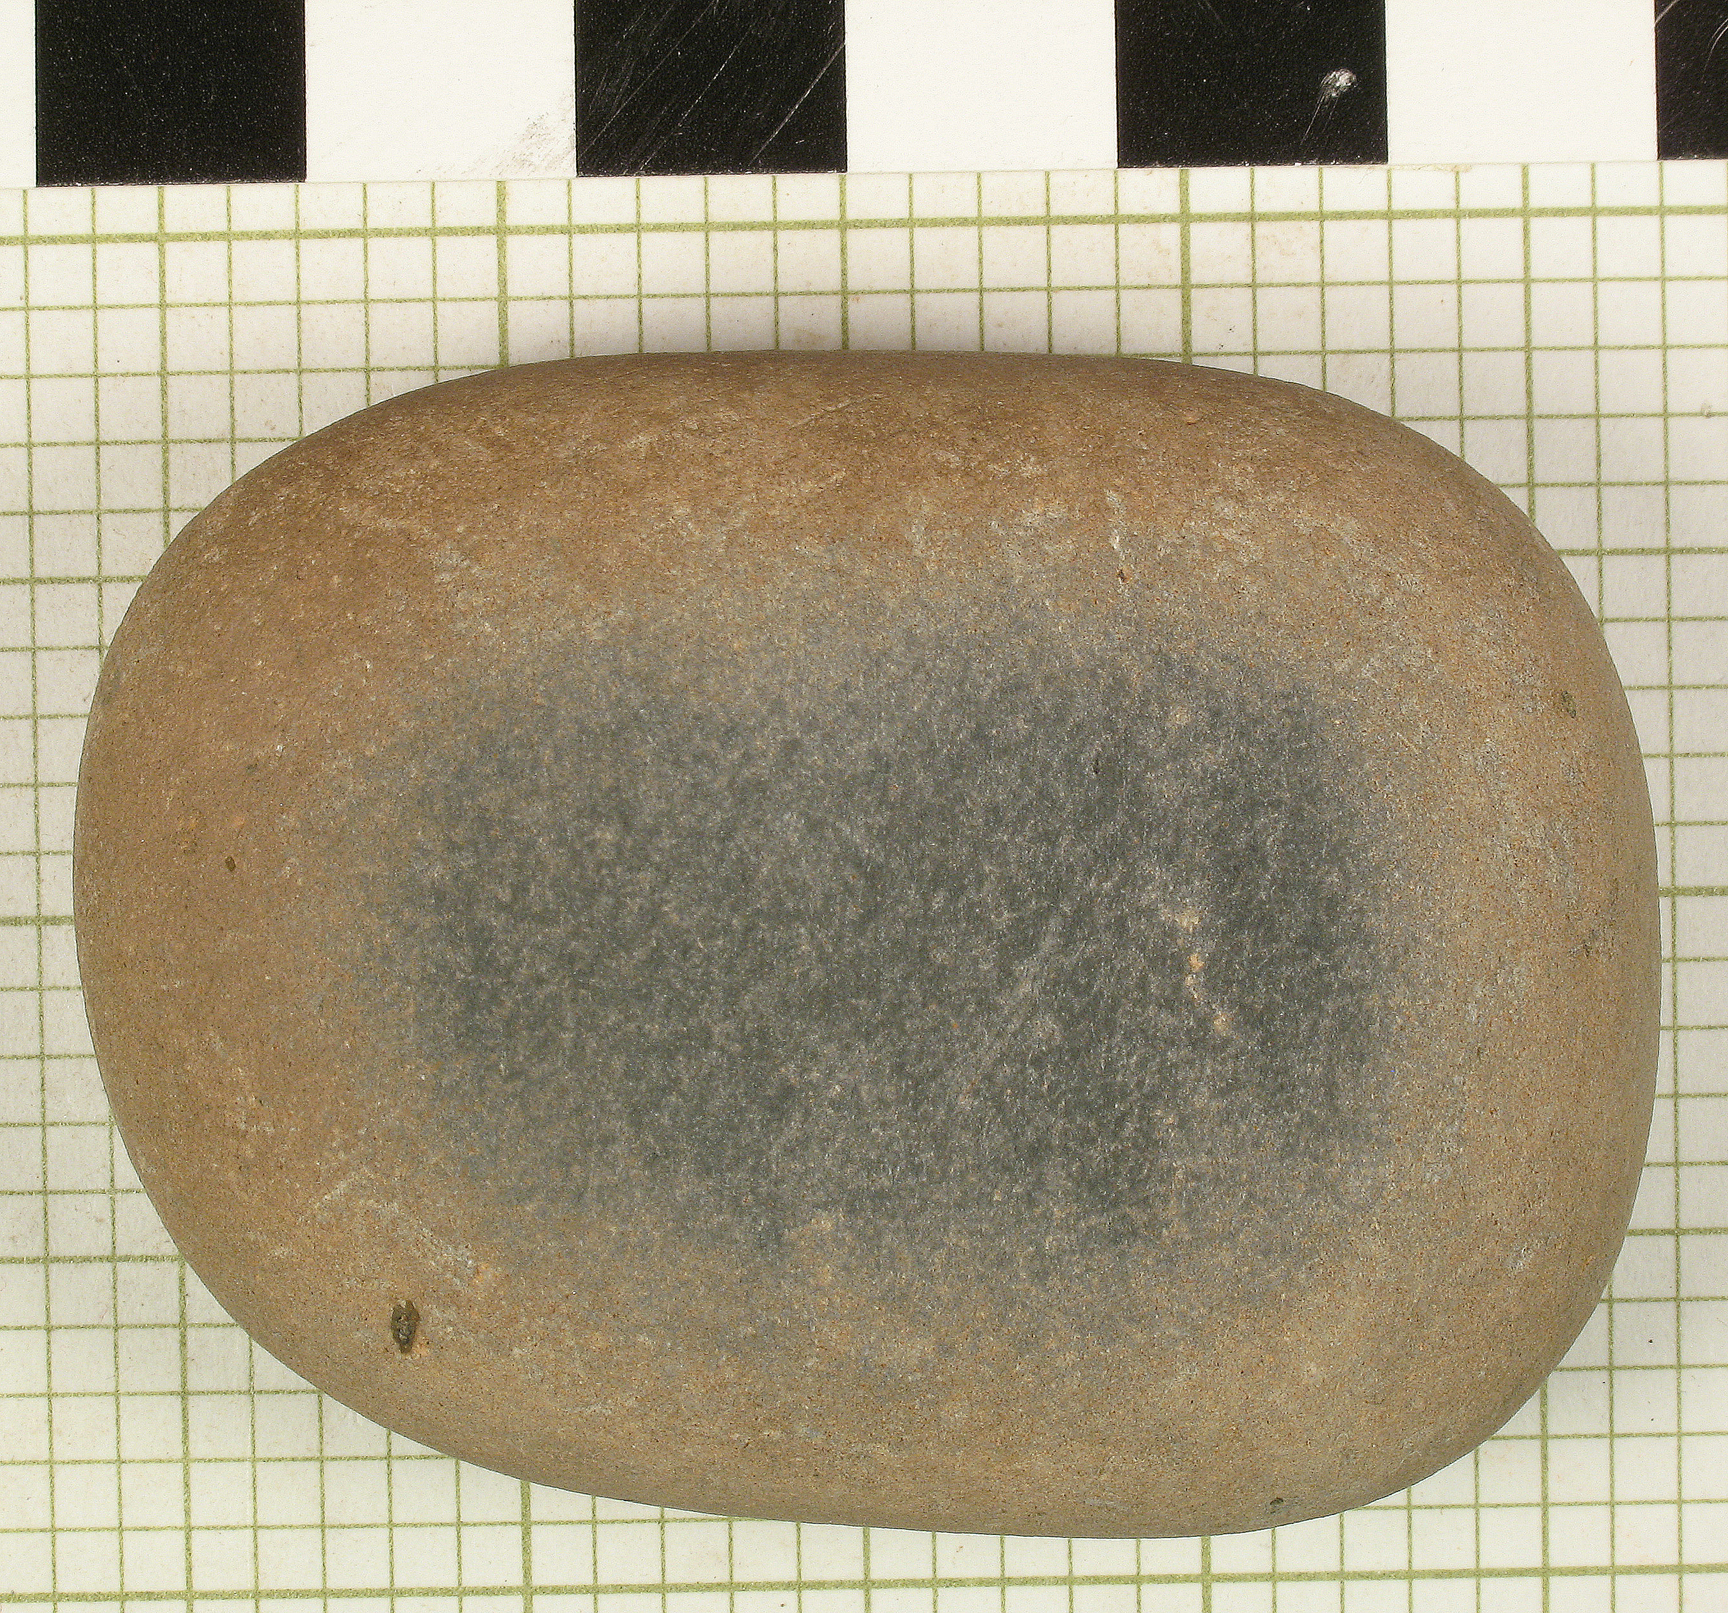
Lapstone found at La Villa that is fine-grained enough to have been used in the finishing stage of stone or shell ornament. The darker area on the surface is smooth and would have put a light polish on the ornament. Photo by Jenny Adams.
In the previous blog I wrote about the shapes of holes in beads and what they indicate about hole-forming techniques. Hole shapes are also useful for determining if the ornaments were newly manufactured or if they had been previously strung and worn. When strung, the movement of ornaments along the strand and against each other causes use-wear across the bead surfaces around the hole, smoothing any manufacturing features and elongating the top of the hole where it rubbed against the string. What I don’t know, and need experimental research to ascertain, is how long it takes for use-wear to become visible in the holes—days, months, or years?
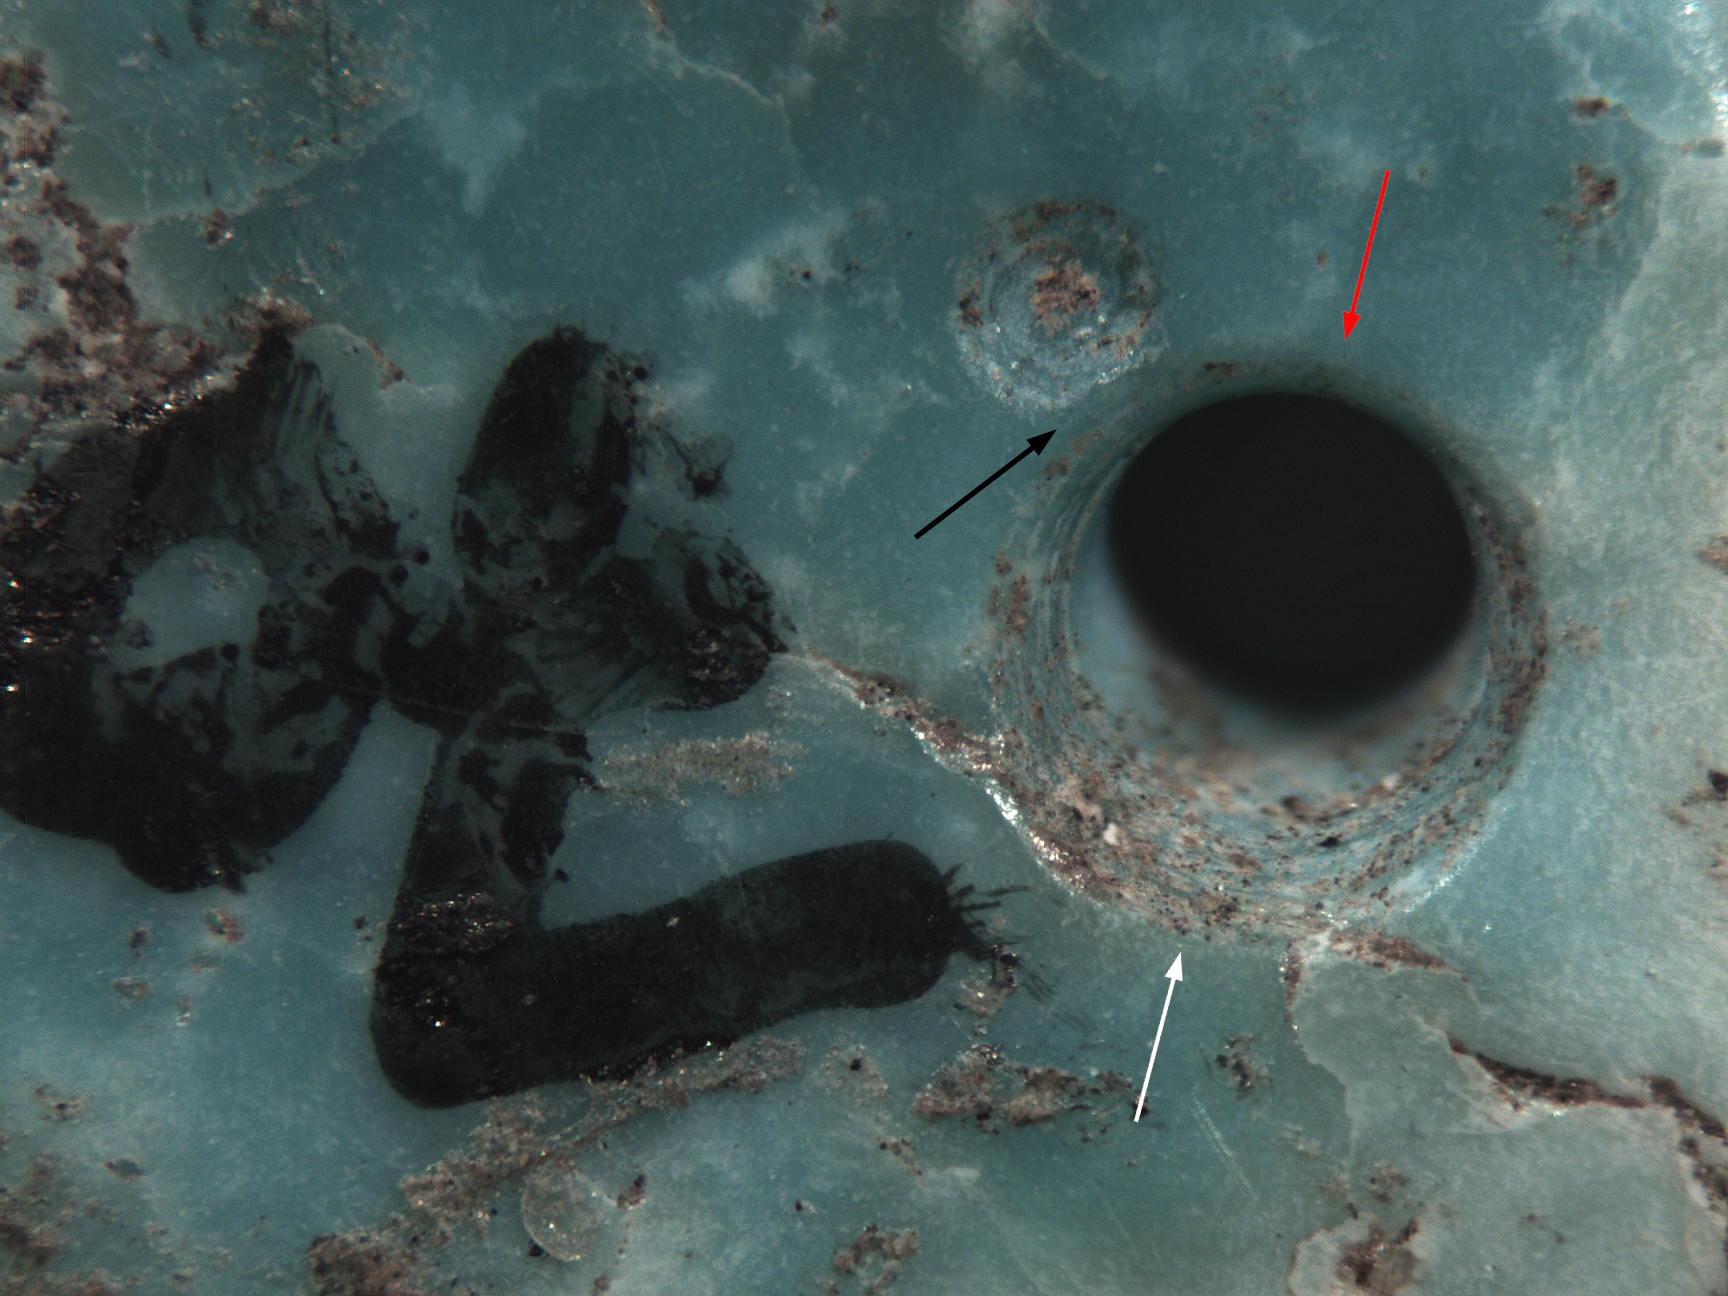
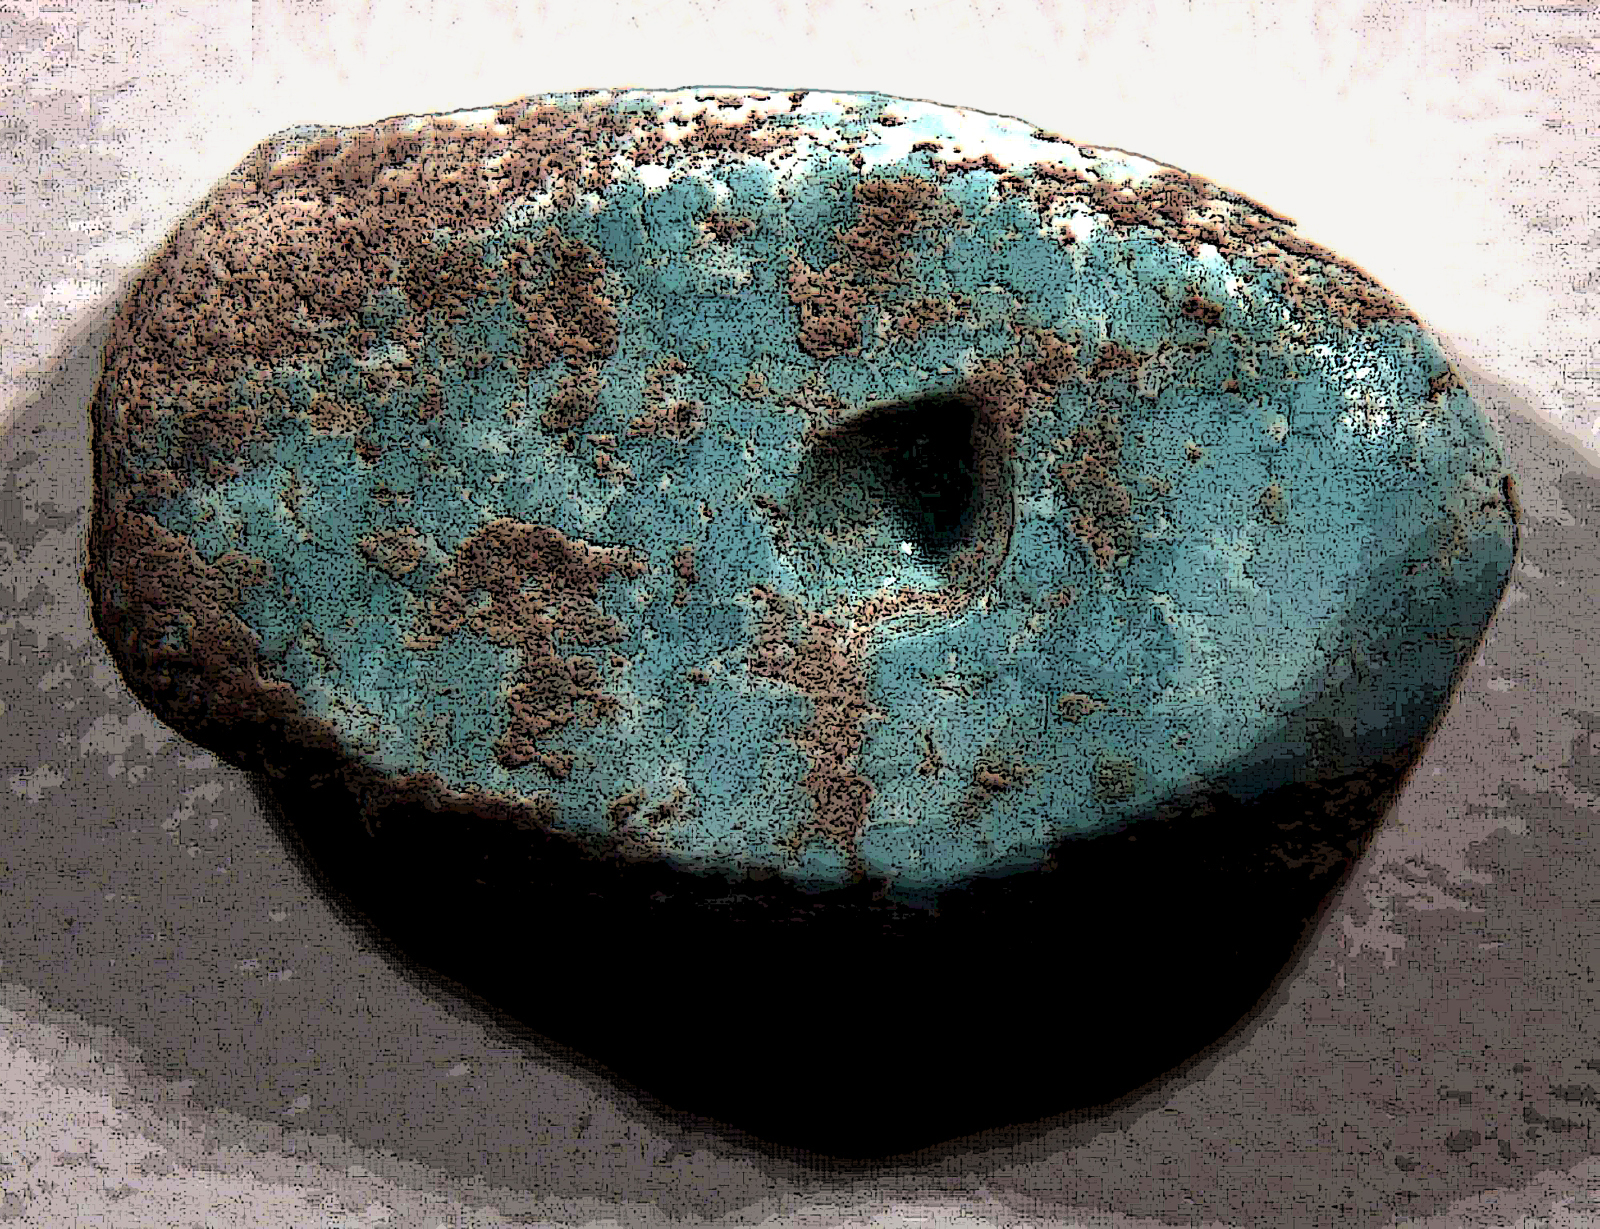
Photomicrograph at 40x magnification of a biconical hole in a turquoise ornament drilled with a stone bit (click to enlarge). The curvilinear abrasions inside the hole and the narrowing of the hole toward the middle are the telltale signs of a stone bit. Toward the top, the abrasions and the sharp edge of the hole have been worn smooth from rubbing against a string (red arrow). Compare this area to the bottom of the hole, where striations from the drill are still visible (white arrow). Note also the small depression to the upper left that marks an earlier attempt at drilling a hole. Use-wear from the string has obscured the lower right edge of the unfinished hole (black arrow). The bead was recovered from a Hohokam Sedentary period (AD 950-1150) pithouse at Honey Bee Village in Oro Valley. Photomicrograph by Jenny Adams.
Haury’s documentation of possible techniques used to make tiny beads has been considered state-of-the-art for decades. Recent research with analysis techniques that were not available 80 years ago are refining more than refuting his conclusions.
Erratum: the original version of this post mistakenly credited the Yuma Wash and Honey Bee analyses to Arthur Vokes.